LCol (ret) Tom Compton, CD, BA
Director, Argyll Regimental Museum & Archives
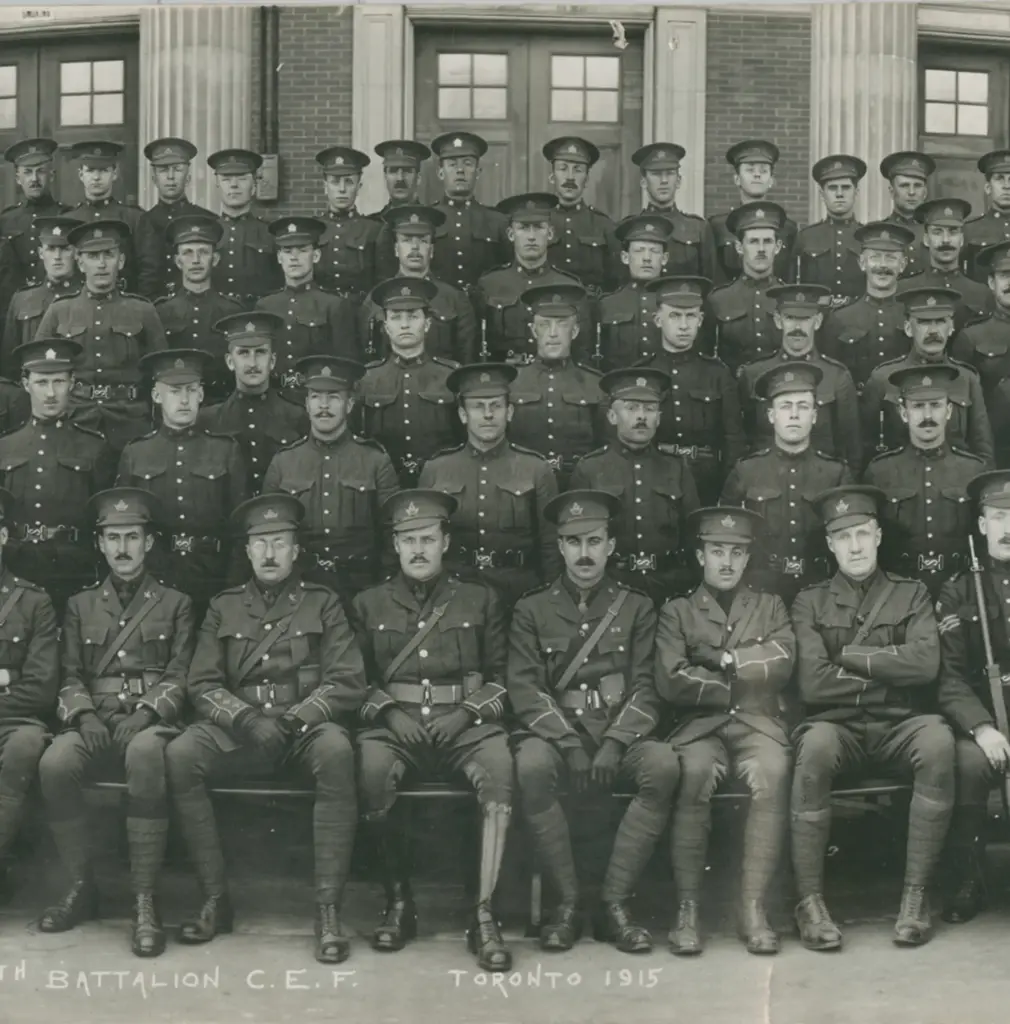
L/Sgt Percy James was a member of what was known as the Bombing Section. He would be employed on attacks and raids in the forefront of the battalion and raiding parties from his company. James wrote home to his father about how he would clear a bunker of enemy by first throwing in a “smoke bomb” and waiting for the enemy to appear, “… those who offered fight never had a chance … those who was [sic] peaceful was allowed to go back [to the Canadian rear area] and eat rations.… You never fear anything when you are into things like that. For you follow the crowd and enjoy yourself running around to see what you can pick up.” In fact, Percy would frequently send home letters referencing a button enclosed off a German uniform or some other form of trench trinket picked up from the Germans, no doubt gathered whilst on a trench raid or attack. We believe L/Sgt James was on the 29 July raid along with platoon commander Lt Hooper, who on this raid led the security team. The officer leading the trench raid was Capt Charles Edward Kilmer.
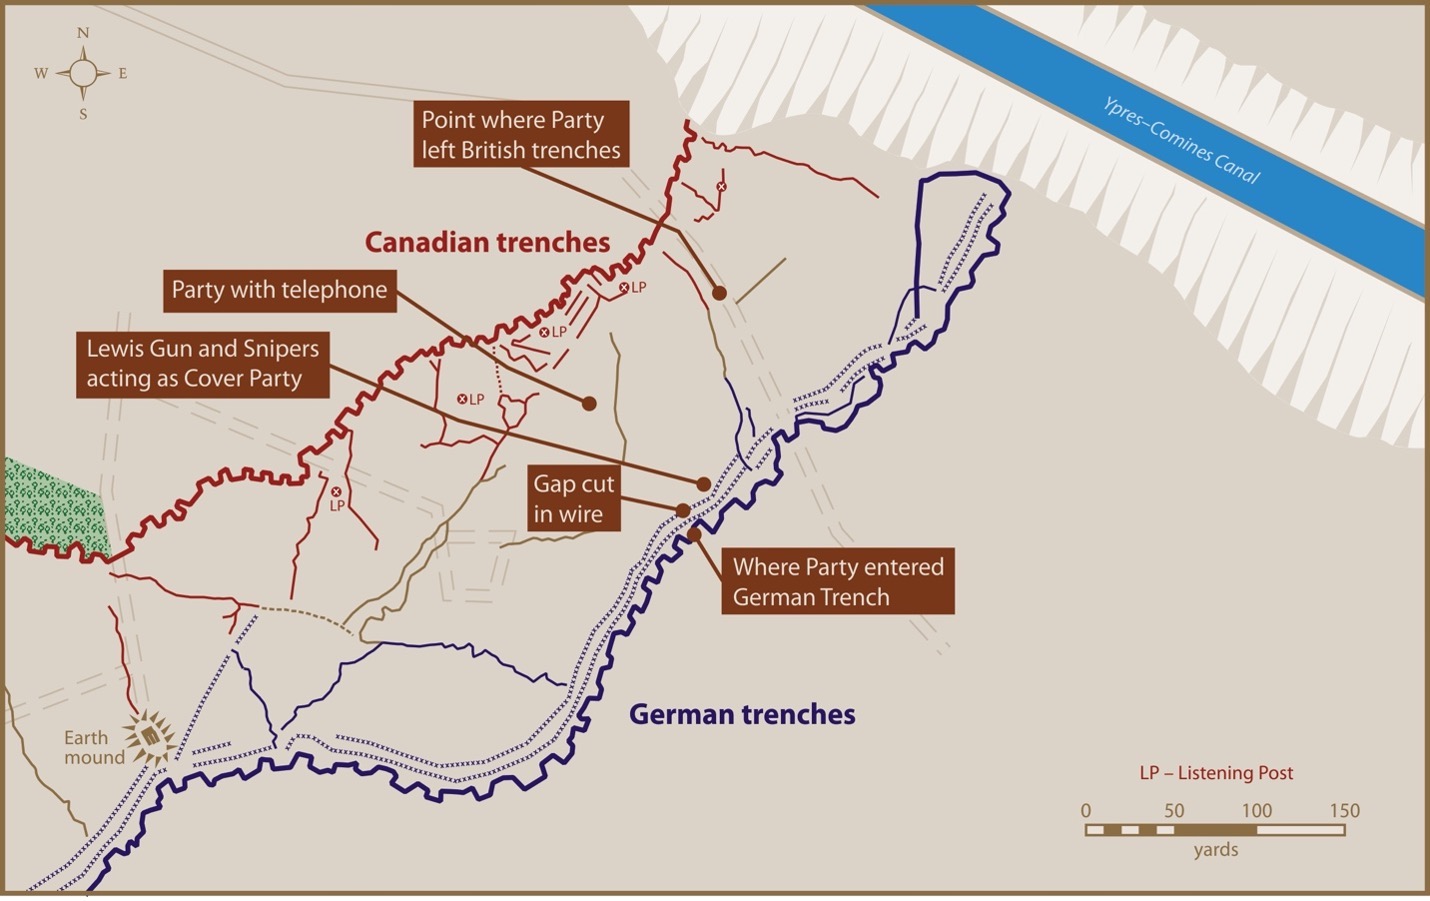
Map 1. A map of the ground in Palingbeek where the raid took place. (Courtesy of Dr. Mike Bechthold)
The raid was meticulously planned down to designating the security teams, the communications plan back to the supporting field artillery, and the assaulting or raiding parties. The entire 40-man party would infiltrate along a gully, then the security teams led by Lt Hooper would provide overwatch and man a field telephone line linked to supporting artillery. Once the breach was secure, the raiders would rush in, shooting and throwing grenades as they worked their way in and along the trench system. At one point, Kilmer directed five grenades be thrown into a bunker. The grenades exploded and the raiders pushed on as the screams of the wounded receded behind them. The 19th’s soldiers completed their assigned tasks by identifying the German troops to be from a Wurtemburg regiment. They observed some mysterious boxes believed to be gas projectors and they gained a better understanding of the German trench layout. German casualties were believed to be approximately 40 to 50. The raiders fought their way out as they withdrew with just a few wounded themselves. This is where the covering fire of the Canadian artillery was so effective in supporting the withdrawal and recovering the wounded Capt Kilmer. Kilmer had been wounded as he was withdrawing and fell into a shell hole just eight yards from the German trenches with a badly mangled right leg. Once the raiders had returned to the 19th Battalion trenches, he was noticed missing. Pte Joseph Newton volunteered to go rescue him as did Pte Wilfred Wilson. Newton and Wilson found Kilmer in the shell hole, picked him up, and carried him back to the 19th’s lines. Kilmer was awarded the Distinguished Service Order (DSO) (see an example, figure 1) and the citation for the medal read: “… for his conspicuous gallantry. He led a successful daylight attack on the enemy’s trenches. Though severely wounded, he was the last man to withdraw after all his party, including the wounded, had got clear” [London Gazette 29760]. Both Newton and Wilson were decorated with the Distinguished Conduct Medal (DCM) (see an example, figure 2) for their “conspicuous bravery” under fire as they rescued Kilmer. Both the DCM, for Other Ranks, and the DSO, for Officers are second only to the Victoria Cross in recognition of gallantry in the face of the enemy. Later, the King of Montenegro awarded both Newton and Wilson the Montenegro Silver Medal for Bravery (see an example, figure 3) for this same operation.
Unfortunately for Capt Kilmer, he subsequently had his right leg amputated as a result of the wounds sustained on this raid. Harry Pepler received multiple shrapnel wounds to his right leg, and both Kilmer and Pepler were sent back to Canada, where they were both discharged from the Army. But Harry Pepler’s military service was not finished as he slowly recovered from his injuries and later volunteered for the Canadian Expeditionary Force that was sent to Siberia to fight the Bolsheviks. Harry embarked 26 December 1918 for Vladivostok and then returned 21 May 1919 as Canada withdrew its forces from Russia.
As for Newton and Wilson, both were also wounded during the operation, with Joseph Newton receiving multiple gun-shot wounds to both shoulders and Wilfred Wilson surviving a near miss by an artillery shell that left him buried and severely concussed. Newton was eventually evacuated to Canada and subsequently discharged as no longer fit for military service. Wilson was diagnosed with severe concussive headaches and “shell shock.” He too was eventually returned to Canada and discharged as no longer medically fit.
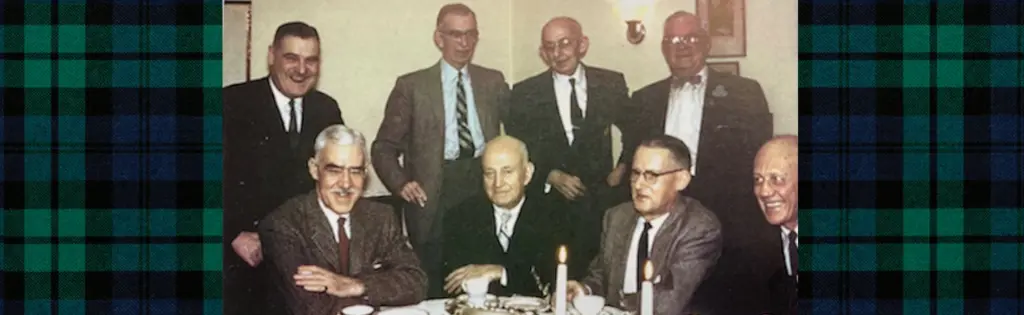
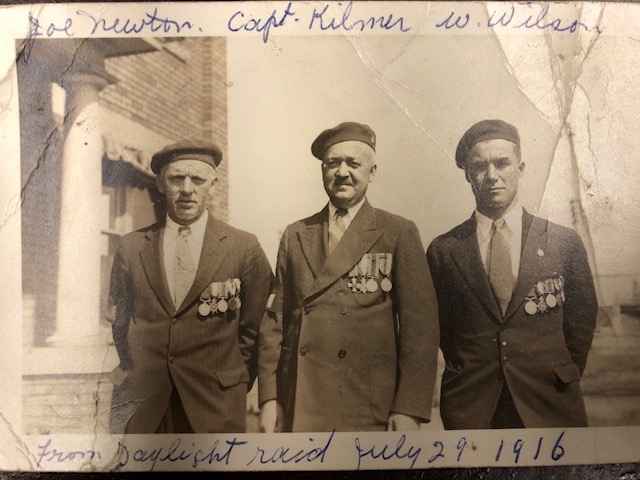
We do not have any photos of Pepler or Dillon, but the Argyll Museum and Archives does have a well-worn image of Newton, Kilmer, and Wilson taken after the war (see figure 4). Apologies to readers for the quality of the photo but you can certainly make out each man well enough.

Figure 4. A well-worn image of Pte Joseph Newton DCM, Charles Kilmer DSO, and Wilfred Wilson DCM. (Argyll Museum and Archives)
Another 19th Battalion officer, Lt Harry Brougham Pepler, led the raiding teams and received a Military Cross (MC) (see an example, figure 1). In addition, and in support of the raid, was Lt Dillon from the 17th Battery, Canadian Field Artillery, who was also awarded an MC. Dillon was critical to the success of the operation and the rescue of Kilmer as he was the Forward Observation Officer directing fire. His citation notes he actually stood up under withering machine gun and artillery fire to observe the 19th Battalion raiding party, fall of shot and to communicate with his supporting guns.
Acknowledgements
Details of this action were found in It Can’t Last Forever: The 19th Battalion and the Canadian Corps in the First World War by Dr. David Campbell.
Thank you to Dr. Mike Bechthold for Map 1.
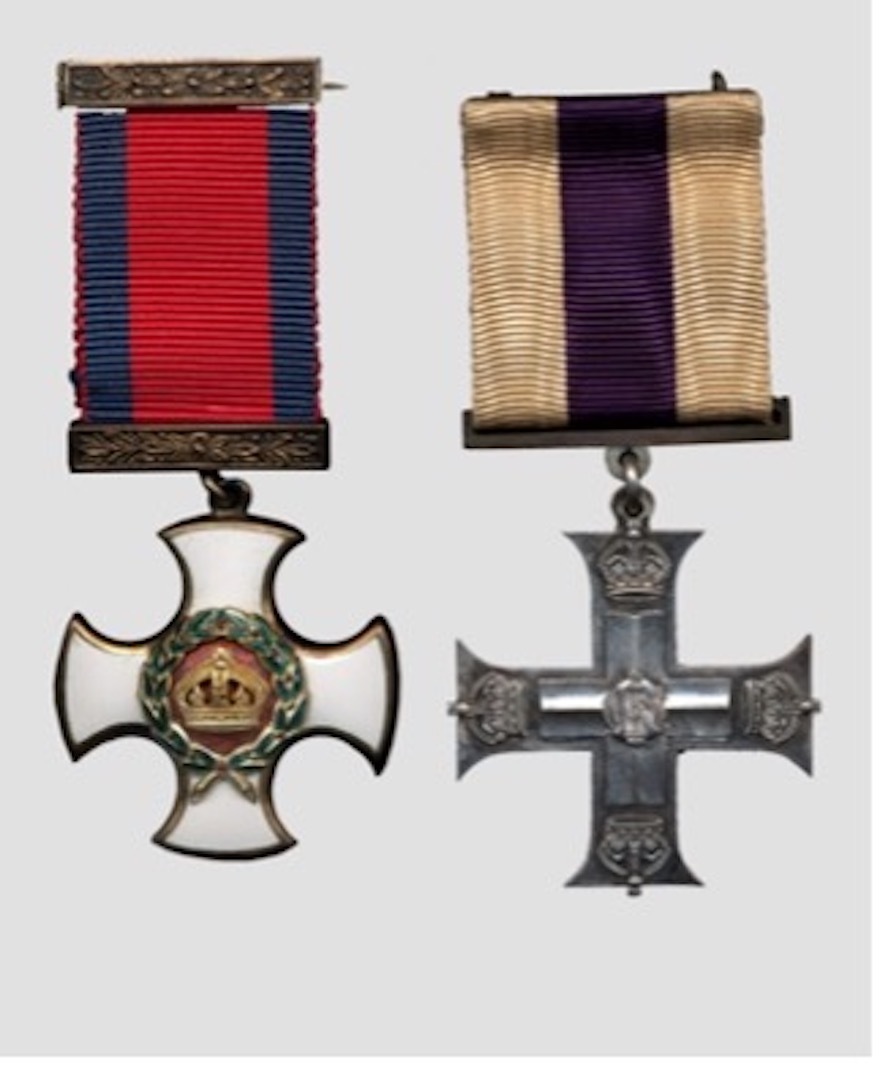
Figure 1. The Distinguished Service Order (at left) was generally given to officers in command, above the rank of Lieutenant-Colonel, and awards to ranks below this were usually for a high degree of gallantry just short of deserving the Victoria Cross. The Military Cross (at right) could be awarded to Commissioned Officers of the substantive rank of Captain or below (therefore acting and temporary Majors were eligible) or Warrant Officers for distinguished and commendable services in battle. An award to Warrant Officers, Non-Commissioned Officers, and men of the British Army for “distinguished, gallant and good conduct in the field.” (Canadian War Museum)
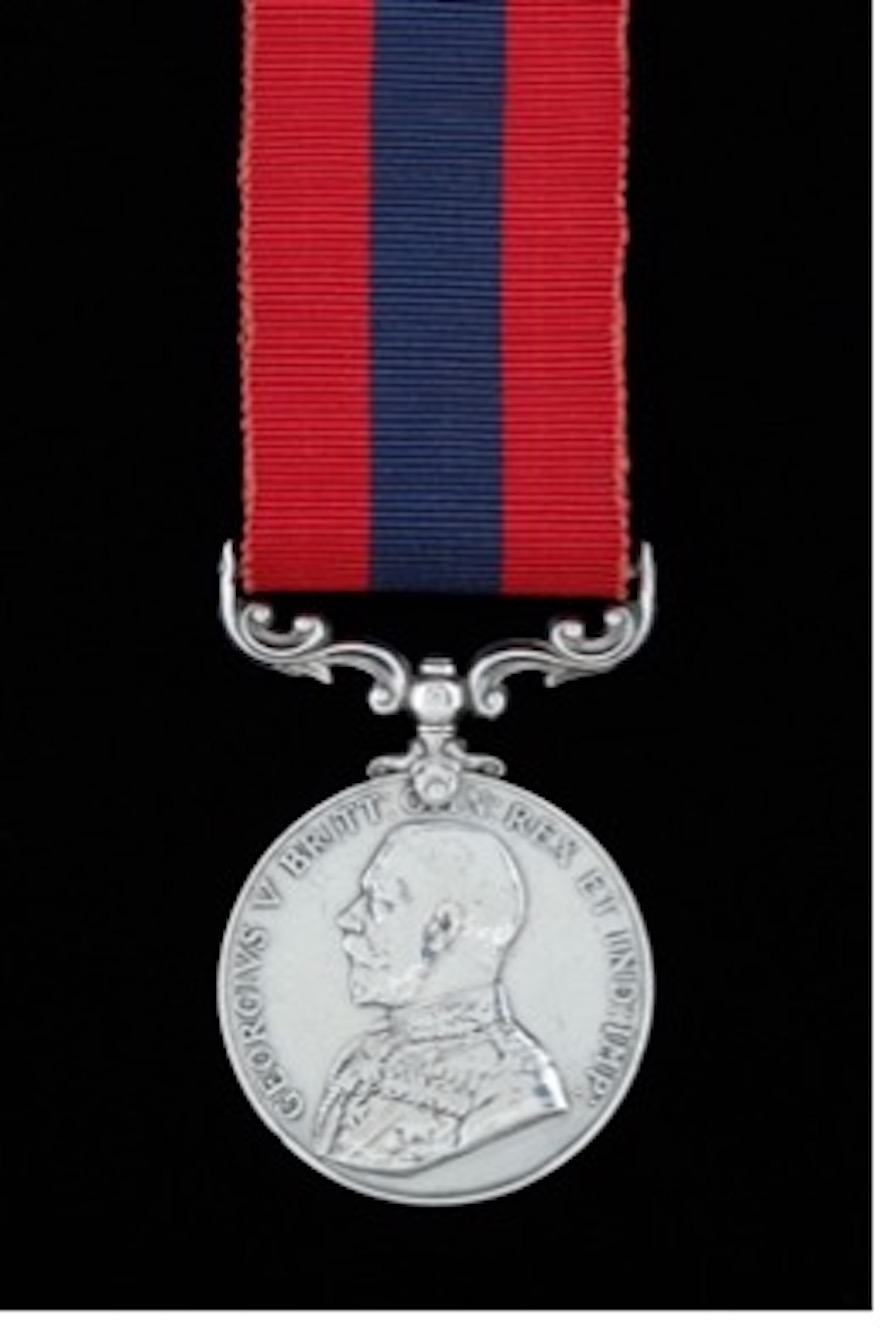
Figure 2. The Distinguished Conduct Medal for all ranks below commissioned officer was the second-highest award for gallantry in action after the Victoria Cross and the other ranks equivalent of the Distinguished Service Order. (Canadian War Museum)
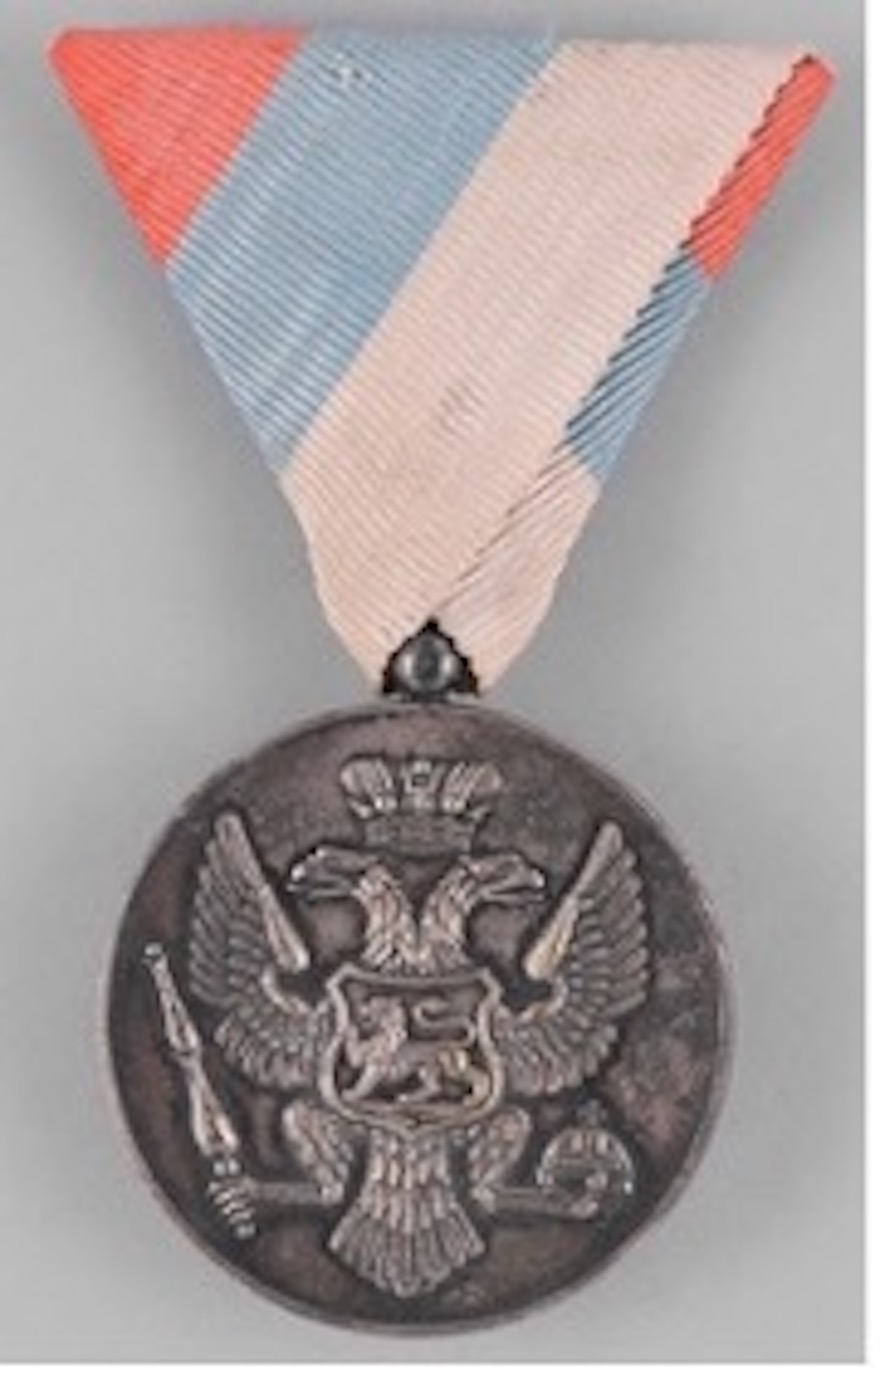
Figure 3. The Montenegrin Silver Bravery Medal was conferred by the King of Montenegro in recognition of gallantry during conflict. It was awarded to a very small number of Allied soldiers during the First World War, 1914-1919, including Joe Newton and Wilfred Wilson.
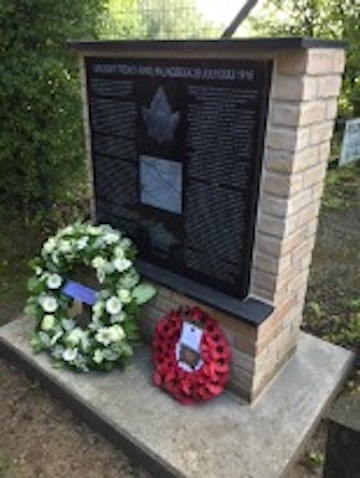
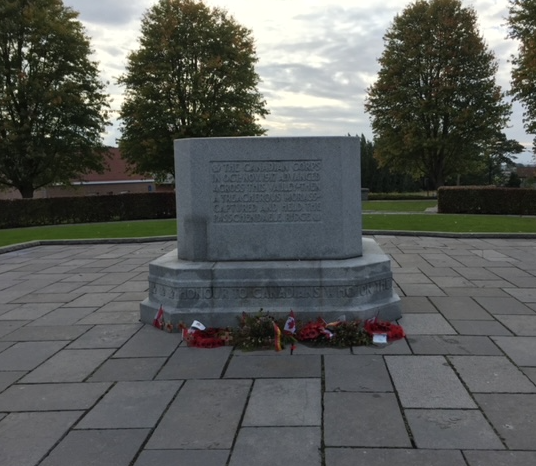
Figure 5. The memorial to commemorate the daylight trench raid, 29 July 1916. This memorial was erected in Palingbeek, Belgium, at the site of the raid, by the Argyll Regimental Foundation in 2017. (Author’s collection)